
Deploying YOLO11s on Raspberry Pi 5 + Hailo-8 (Full Step-by-Step Guide)
In this guide we’ll go end-to-end from a YOLO11s PyTorch model on an x86 workstation to a Hailo-8 HEF running in real-time on a Raspberry Pi 5 + Hailo-8. The full pipeline is:
yolo11s.pt → yolo11s.onnx → yolov11s.hef → Raspberry Pi 5 + Hailo-8We’ll use Ultralytics to export ONNX, MiniImageNet for calibration, the Hailo AI Software Suite & Model Zoo for compilation, and finally HailoRT on the Raspberry Pi for inference.
1. Workstation Setup (Ubuntu 22 + NVIDIA GPU)
On the x86 workstation (for example, a Dell Precision with a Quadro RTX 6000) install the NVIDIA driver and verify that the GPU is visible:
nvidia-smiThe GPU is not required for the Hailo compiler, but it’s useful for other deep learning tasks on the same machine.
2. Download YOLO11s and MiniImageNet
Create a working directory and place the model and dataset there:
mkdir -p ~/yolo11_train
cd ~/yolo11_train

# Files after download / extraction
yolo11s.pt
archive/        # MiniImageNet extracted here
The archive/ folder contains many class subdirectories with images.
We will use them for calibration.
3. Build a Calibration Image Folder
Hailo’s compiler needs a folder of unlabeled RGB images for INT8 quantization
(around 500–1000 is typical). We flatten MiniImageNet into a single
calib/ directory:
cd ~/yolo11_train
mkdir calib

find archive -type f \( -iname '*.jpg' -o -iname '*.jpeg' -o -iname '*.png' \) \
    | shuf | head -n 1000 \
    | xargs -I{} cp "{}" calib/
4. Export YOLO11s to ONNX
Create a Python virtual environment and install Ultralytics:
cd ~/yolo11_train
python3 -m venv .venv
source .venv/bin/activate
pip install -U pip ultralytics onnx onnxruntime
Export yolo11s.pt to ONNX (640×640 input size in this example):
python - << 'EOF'
from ultralytics import YOLO

model = YOLO("yolo11s.pt")
model.export(
    format="onnx",
    imgsz=640,
    opset=13,
    dynamic=False
)
EOF
After export you should see:
~/yolo11_train/
├── yolo11s.pt
├── yolo11s.onnx
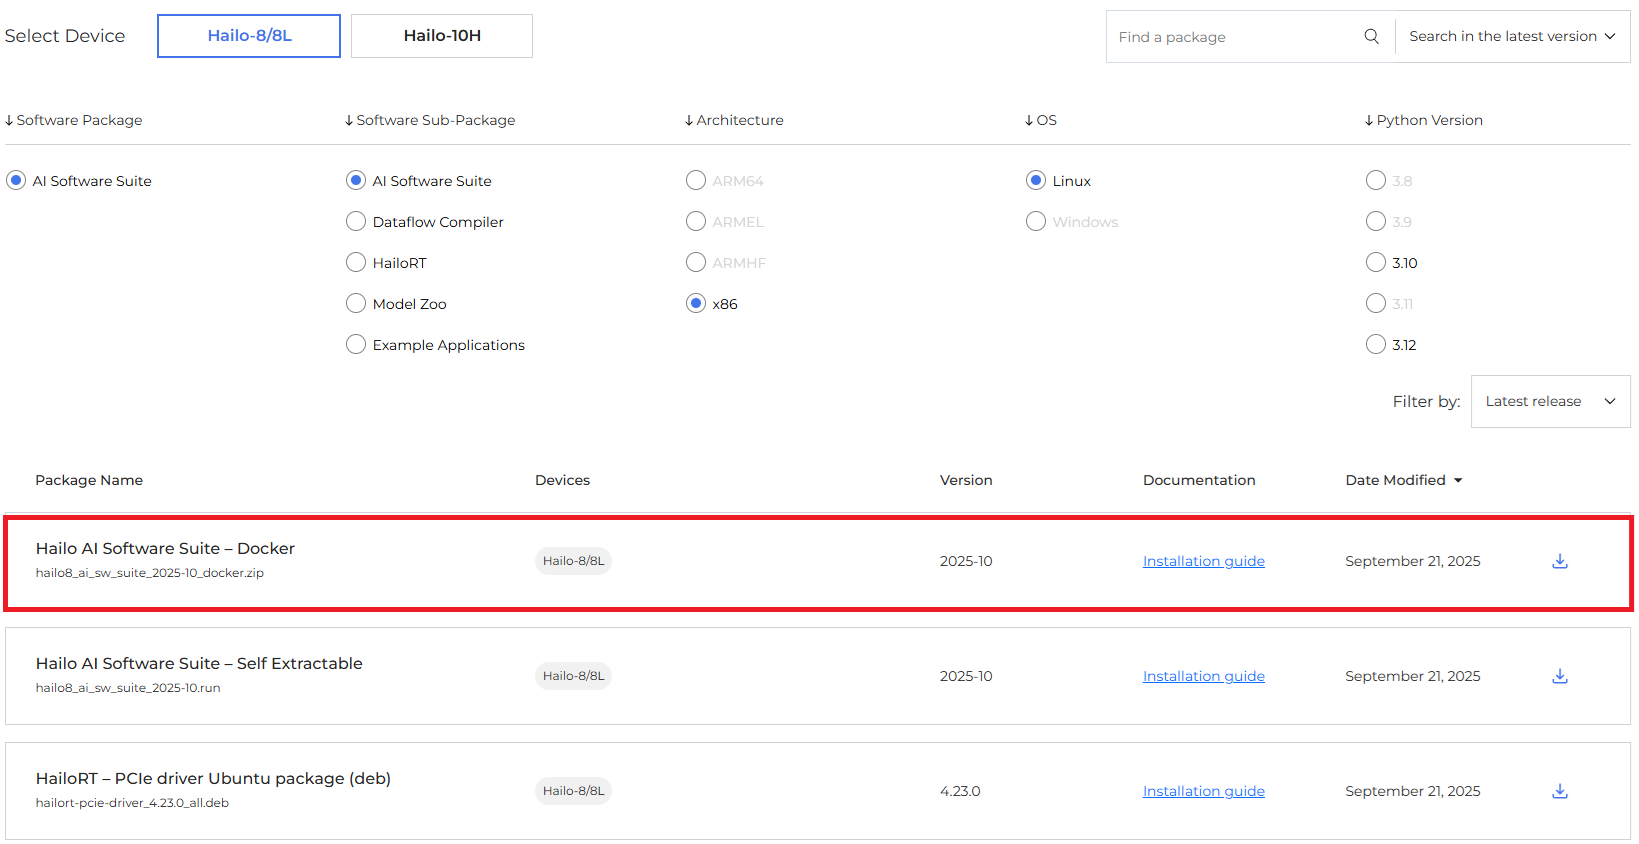
└── calib/5. Install Hailo AI Software Suite (Docker, x86)
On the Hailo Download Center choose: AI Software Suite → AI Software Suite → Linux → x86 → Docker.
Unzip and run the Docker environment:
unzip hailo8_ai_sw_suite_2025-10_docker.zip
cd hailo8_ai_sw_suite_2025-10_docker
./hailo_docker_run.sh
Inside the container, your prompt will look similar to:
(hailo_virtualenv) hailo@...:/local/workspace$
6. Share ONNX & Calibration Data with the Container
The Hailo Docker image exposes /local/shared_with_docker/ as a
convenient shared folder. Copy your ONNX and calibration images there
(from the host or directly in Docker):
/local/shared_with_docker/
├── yolo11s.onnx
└── calib/
7. Clone and Install the Hailo Model Zoo
cd /local/workspace
git clone https://github.com/hailo-ai/hailo_model_zoo.git
cd hailo_model_zoo

pip install -r requirements.txt
pip install .
Confirm that the CLI is available:
hailomz --help8. Use the Built-In YOLO11s Configuration
Recent versions of the Hailo Model Zoo already include YOLO11 configs. You can list them with:
find . -maxdepth 5 -type f -iname "yolov11*.yaml"
You should see, among others:
hailo_model_zoo/cfg/networks/yolov11s.yaml.
This file describes the network structure and post-processing for YOLO11s,
so we don’t need to create a custom YAML file.
9. Compile YOLO11s ONNX → HEF
Now run the compilation. We pass the model name (yolov11s),
our ONNX checkpoint and calibration folder, and the target architecture
(hailo8).
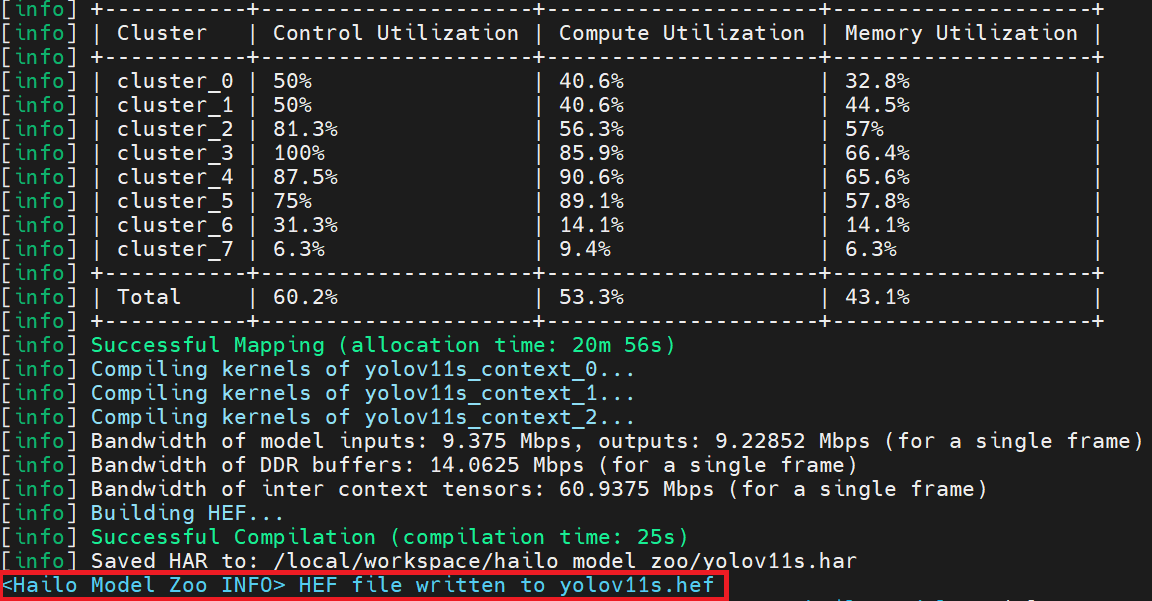
cd /local/workspace/hailo_model_zoo

hailomz compile yolov11s \
  --ckpt /local/shared_with_docker/yolo11s.onnx \
  --calib-path /local/shared_with_docker/calib \
  --hw-arch hailo8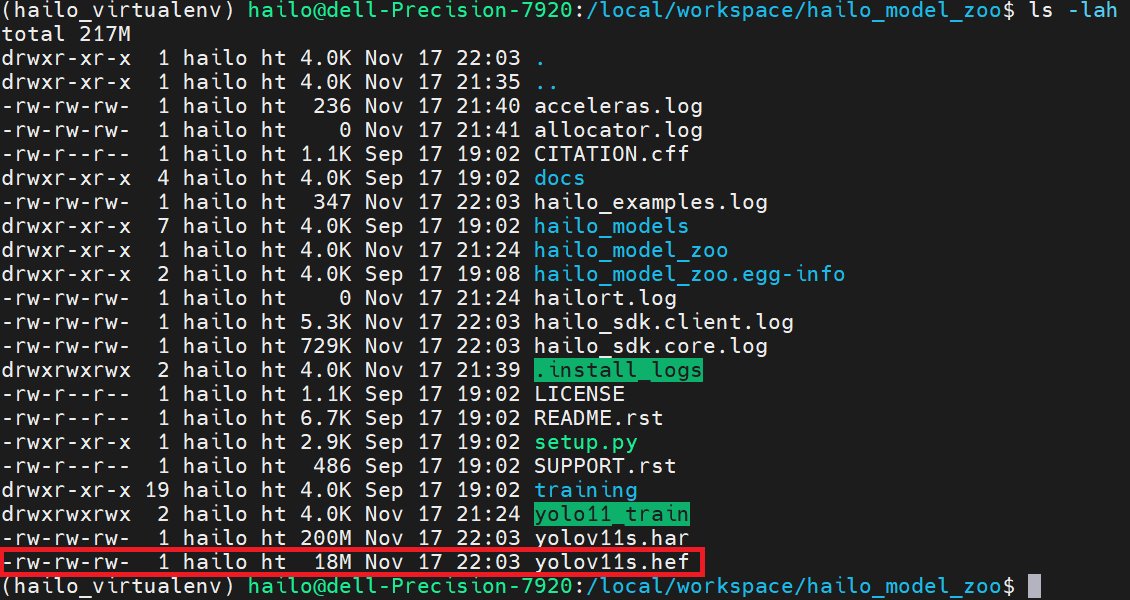
During this step you might see messages like “No GPU chosen and no suitable GPU found, falling back to CPU”. That’s expected: the Hailo Dataflow Compiler runs on the CPU and does not require your NVIDIA GPU.
10. Locate and Export the .hef File
When compilation finishes, search for the generated HEF file:
find . -maxdepth 7 -type f -iname "yolov11s*.hef"
You’ll typically find it in a path similar to:
./hailomz_compilation/yolov11s/hailo8/yolov11s.hef.
Copy it back to the shared directory:
cp ./hailomz_compilation/yolov11s/hailo8/yolov11s.hef \
   /local/shared_with_docker/
You now have a Hailo Executable File that can be deployed on any Hailo-8 device.
11. Copy the HEF to Raspberry Pi 5
On the host workstation, copy the HEF to your Raspberry Pi:
scp yolov11s.hef pi@<raspberry-pi-ip>:/home/pi/12. Install HailoRT on Raspberry Pi 5
On the Raspberry Pi (running the official Raspberry Pi OS image with Hailo support), install the Hailo runtime:
sudo apt update
sudo apt install hailort
Confirm that the Hailo-8 module is detected:
hailortcli device-info13. Minimal HailoRT Inference Skeleton
The following is a very small example of how you might start using
yolov11s.hef on the Raspberry Pi with HailoRT. It omits the full
YOLO post-processing for brevity, but shows the structure.
import cv2
import numpy as np
from hailo_platform import HEF, VDevice

hef = HEF("yolov11s.hef")
vd = VDevice()
network_group = vd.configure(hef)

input_vstream = network_group.get_input_vstream()
output_vstream = network_group.get_output_vstream()

cap = cv2.VideoCapture(0)

while True:
    ok, frame = cap.read()
    if not ok:
        break

    # Resize to model input resolution (640x640 here)
    resized = cv2.resize(frame, (640, 640))
    resized = resized.astype(np.uint8)
    resized = np.expand_dims(resized, axis=0)  # NCHW/NHWC depends on HEF, adjust if needed

    input_vstream.write(resized)
    outputs = output_vstream.read()

    # TODO: apply YOLO11 decoding / NMS on `outputs`
    # and draw bounding boxes on `frame`

    cv2.imshow("YOLO11s – Hailo-8", frame)
    if cv2.waitKey(1) & 0xFF == ord("q"):
        break
In a real project you would plug this logic into your existing Flask + Picamera2 streaming app by replacing the PyTorch-based inference function with a Hailo-backed one.
14. Integrating with a Flask Streaming App (High-Level)
Conceptually, you replace:
# Old: PyTorch/Ultralytics path
frame = run_yolo_on_frame(frame)
with:
# New: Hailo-8 path
frame = run_yolo11_hailo(frame)
where run_yolo11_hailo() sends the frame to the Hailo-8 via
HailoRT, decodes the YOLO11 outputs, draws the boxes and returns the
annotated frame.
15. Conclusion
You’ve gone from a yolo11s.pt PyTorch checkpoint to an
optimized yolov11s.hef running on a Raspberry Pi 5 with Hailo-8.
The heavy lifting happens once on the x86 workstation, and the deployed HEF
runs efficiently on the low-power edge device.
This pipeline can be reused for other models supported by the Hailo Model Zoo—just swap the YOLO11 configuration and follow the same steps.

0 Comments
No comments yet, be the first!
Leave a Comment