Requirements
- Linux host PC with SDK Manager installed
- USB-C cable and proper 50W+ power supply
- NVIDIA account to log in
Steps
-
Install and open SDK Manager.
First, download SDK Manager on your Linux host from NVIDIA SDK Manager. Install it usingsudo dpkg -i ...and fix dependencies withsudo apt --fix-broken installif required. This application is used to manage JetPack versions and handle the flashing process for Jetson devices.
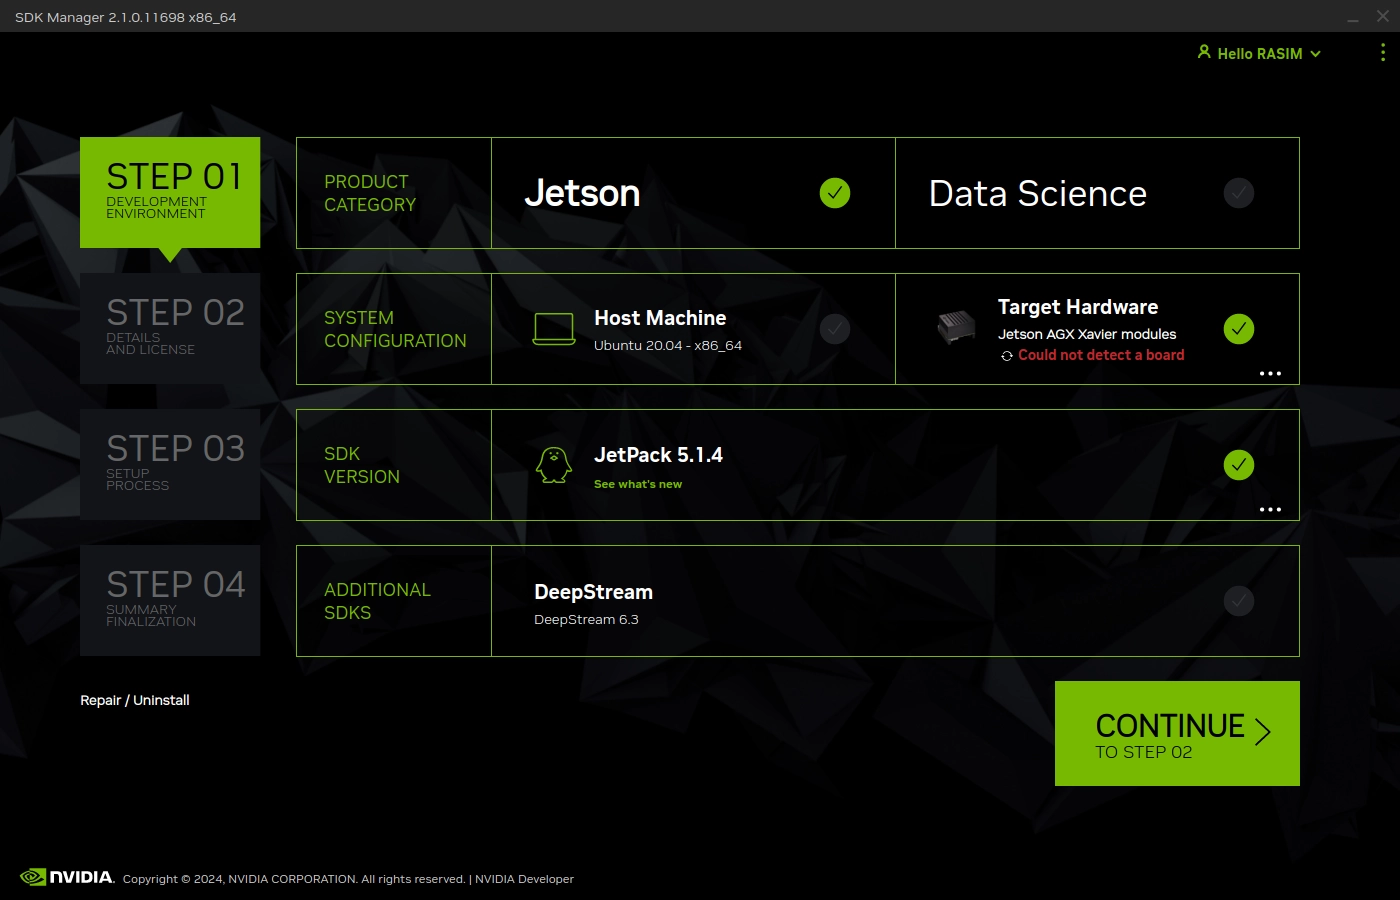
When you open it without a board connected, it looks like this:
-
Put Jetson into recovery mode.
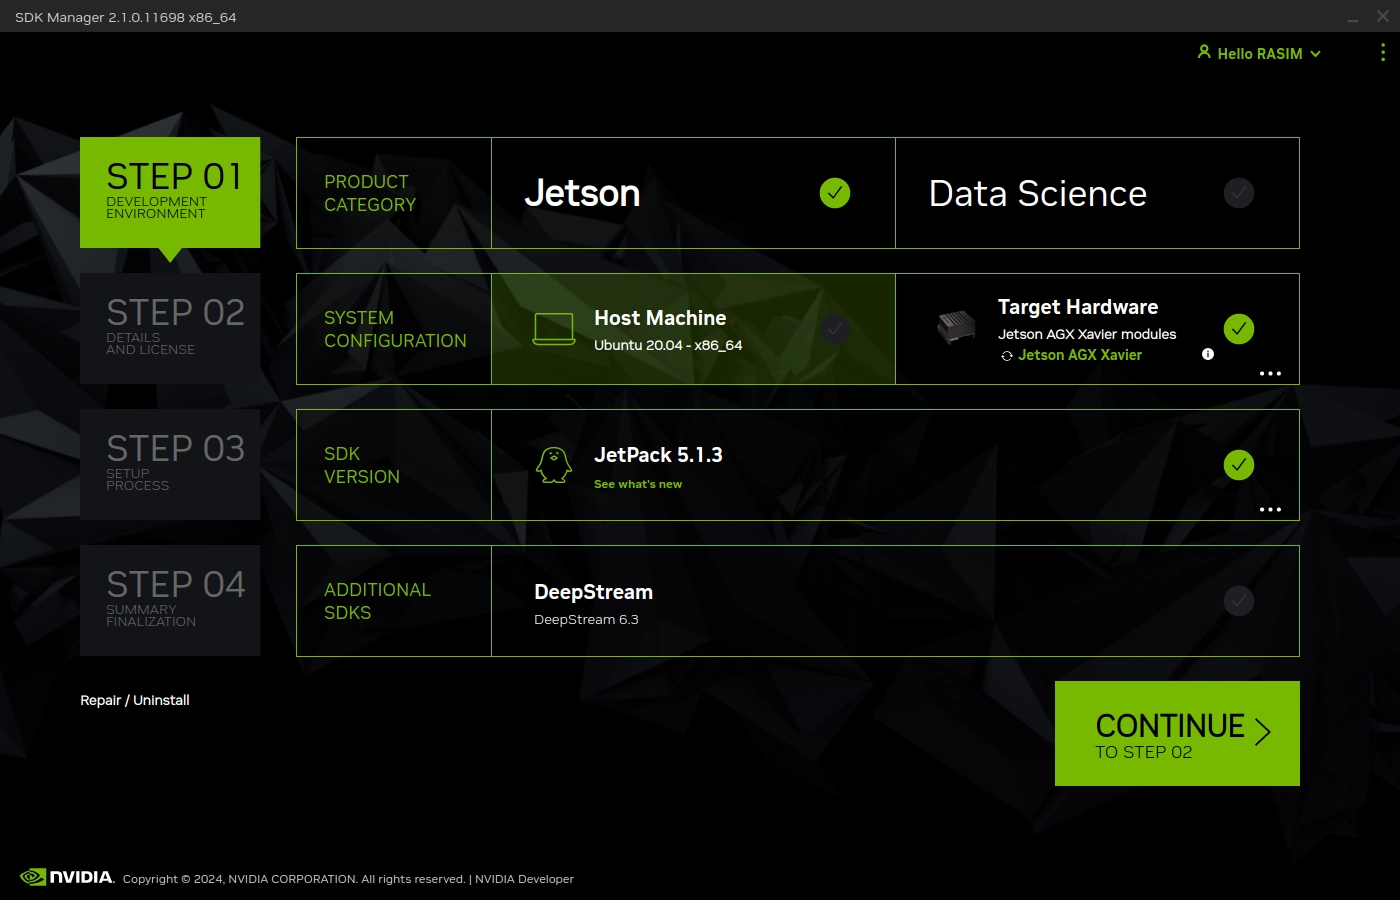
To make the board ready for flashing, press and hold the Recovery button (middle), then press the Power button, and release the Recovery button. If done correctly, your Linux host will detect the device in recovery mode and SDK Manager will recognize it.
-
Select JetPack version and packages.
Once the device is detected, you will be prompted to choose the JetPack version. Select JetPack 5.1.3 (based on Ubuntu 20.04). You can uncheck optional components if you only want the OS image, or keep them for CUDA, AI libraries, and developer tools.
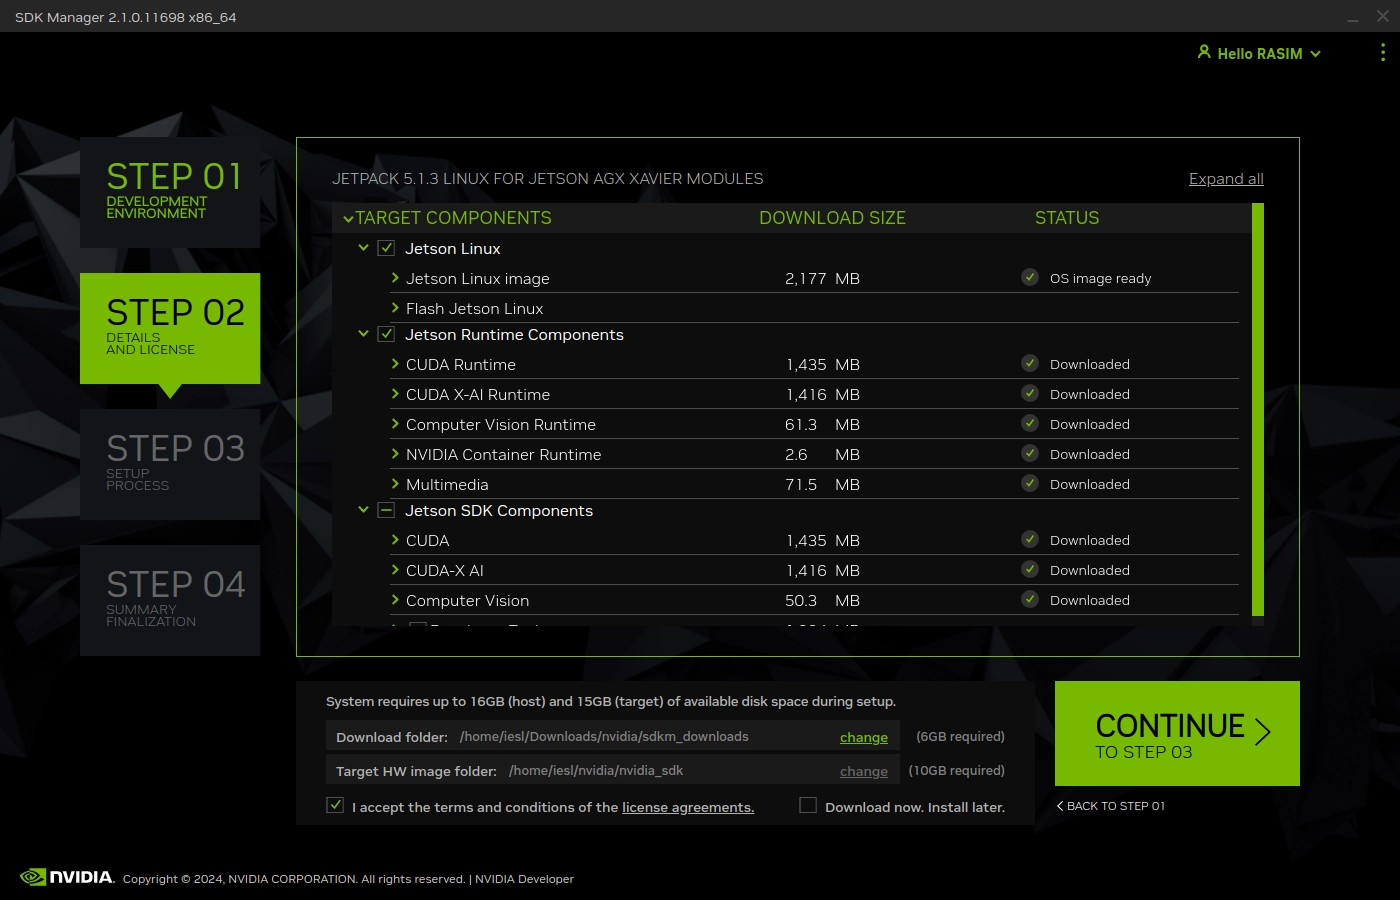
Accept the license agreements to continue:
-
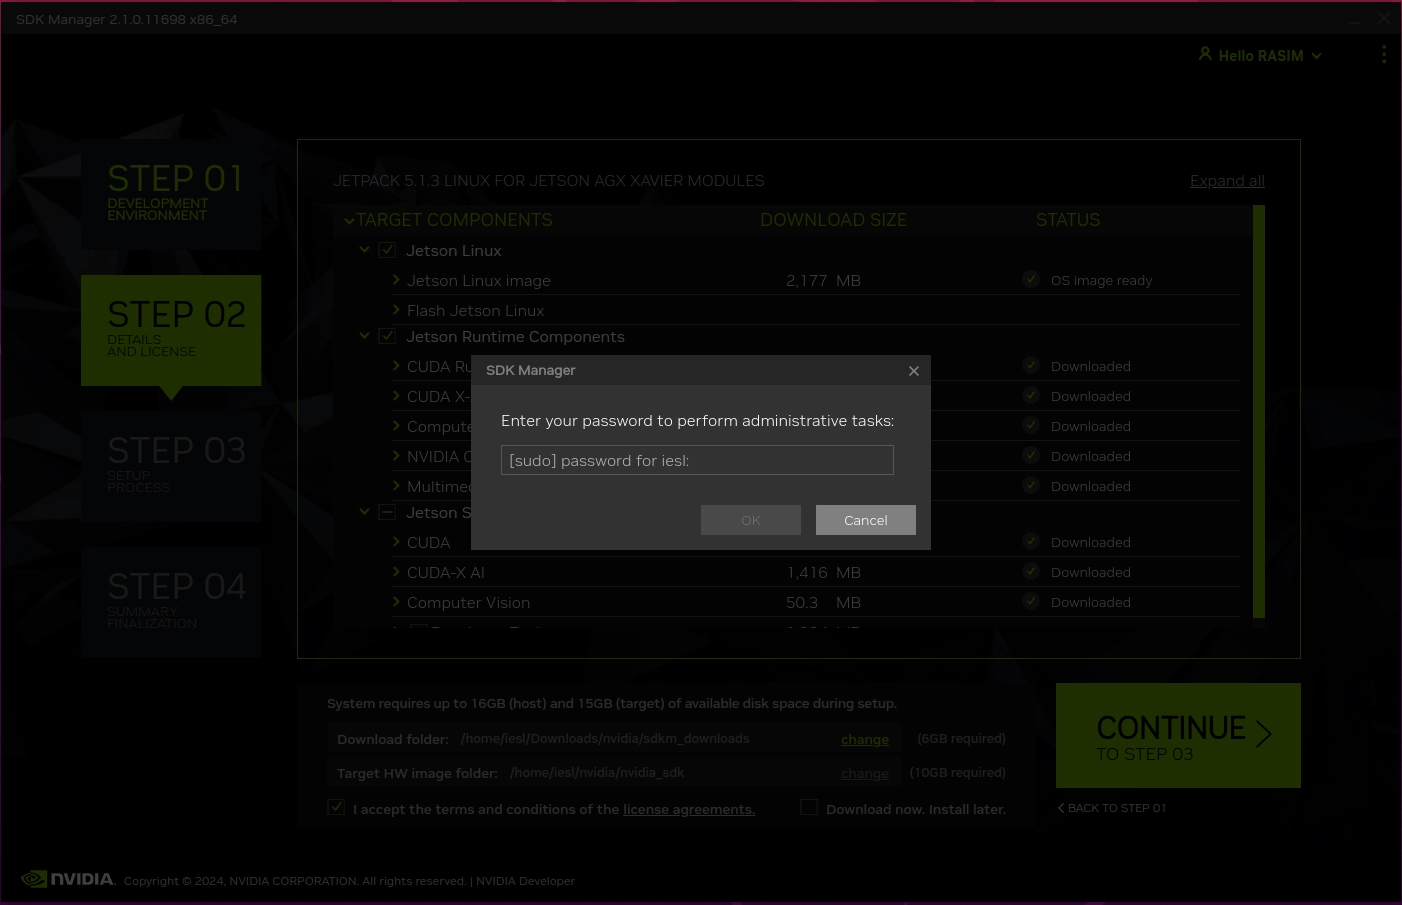
Start the flashing process.
SDK Manager will now ask for your Linux host password (this is required to usesudoprivileges during flashing).
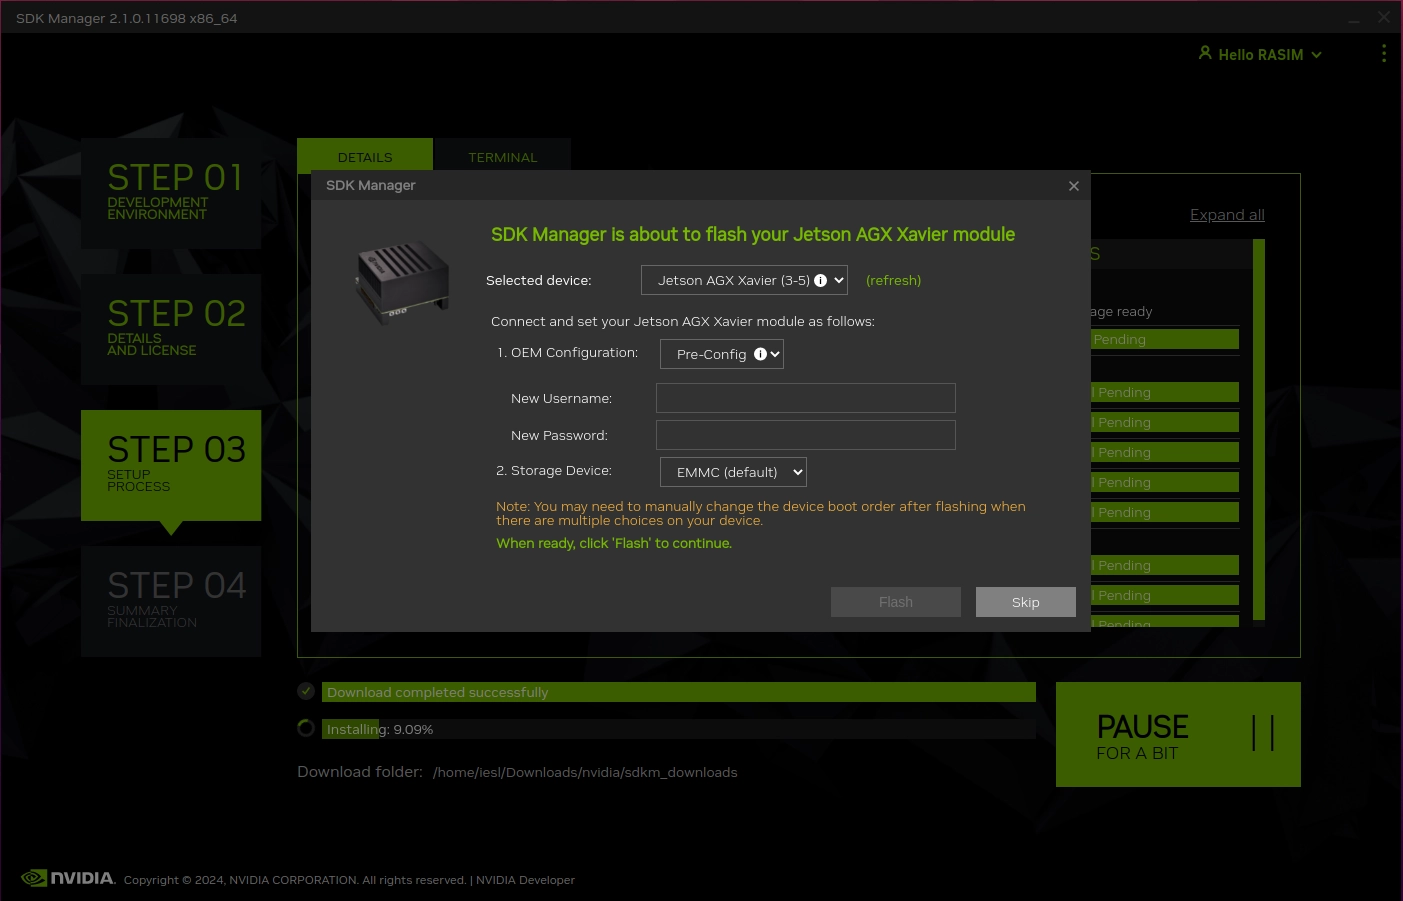
Next, select the target storage (default is eMMC) and configure a new username and password for your Jetson device. This will be the login credentials when you boot it up for the first time.
Flashing begins — do not disconnect power or USB during this process:
-
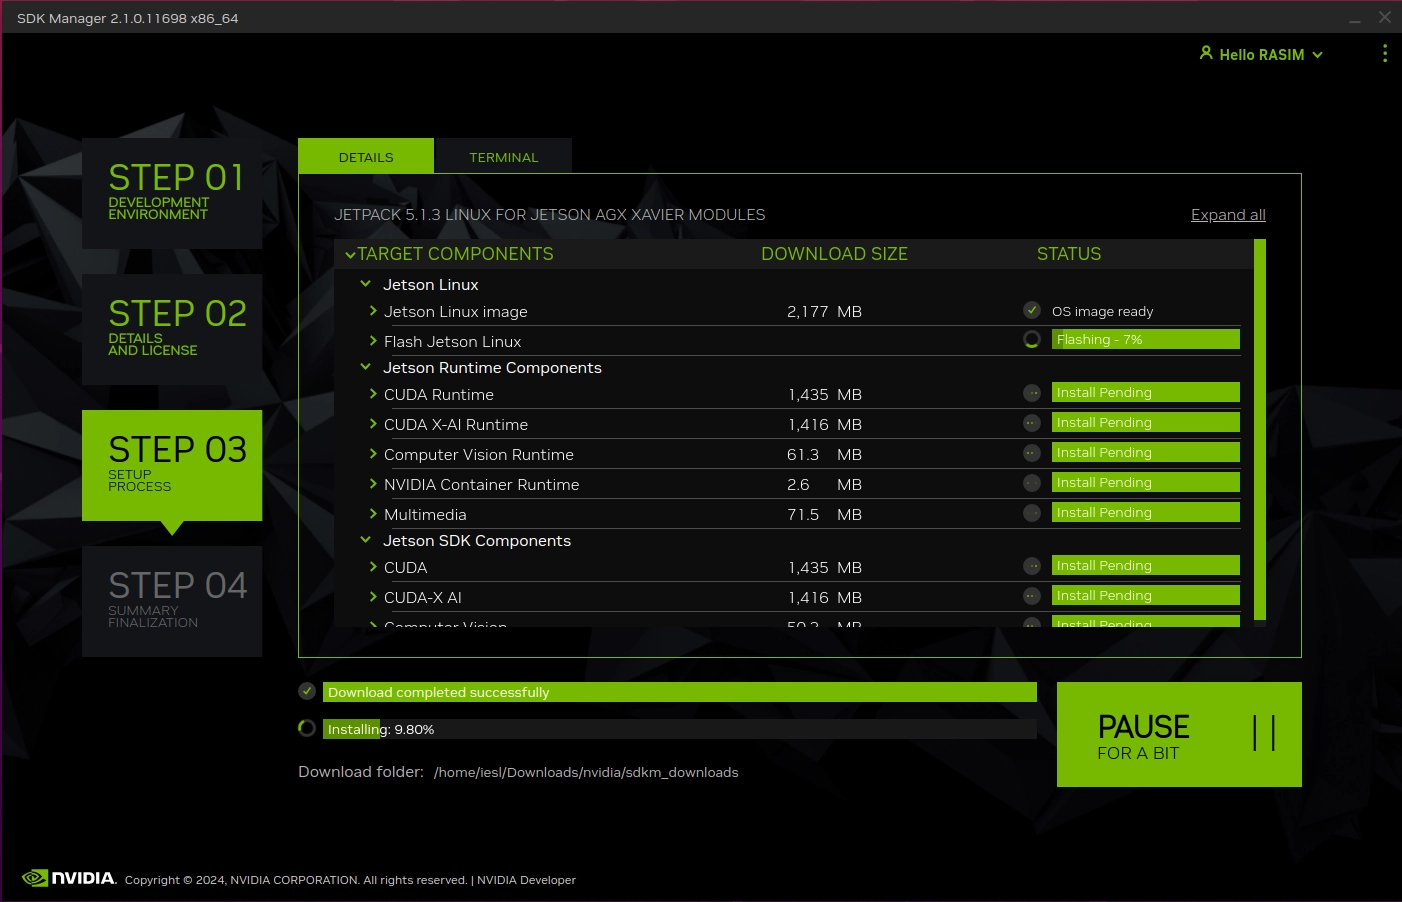
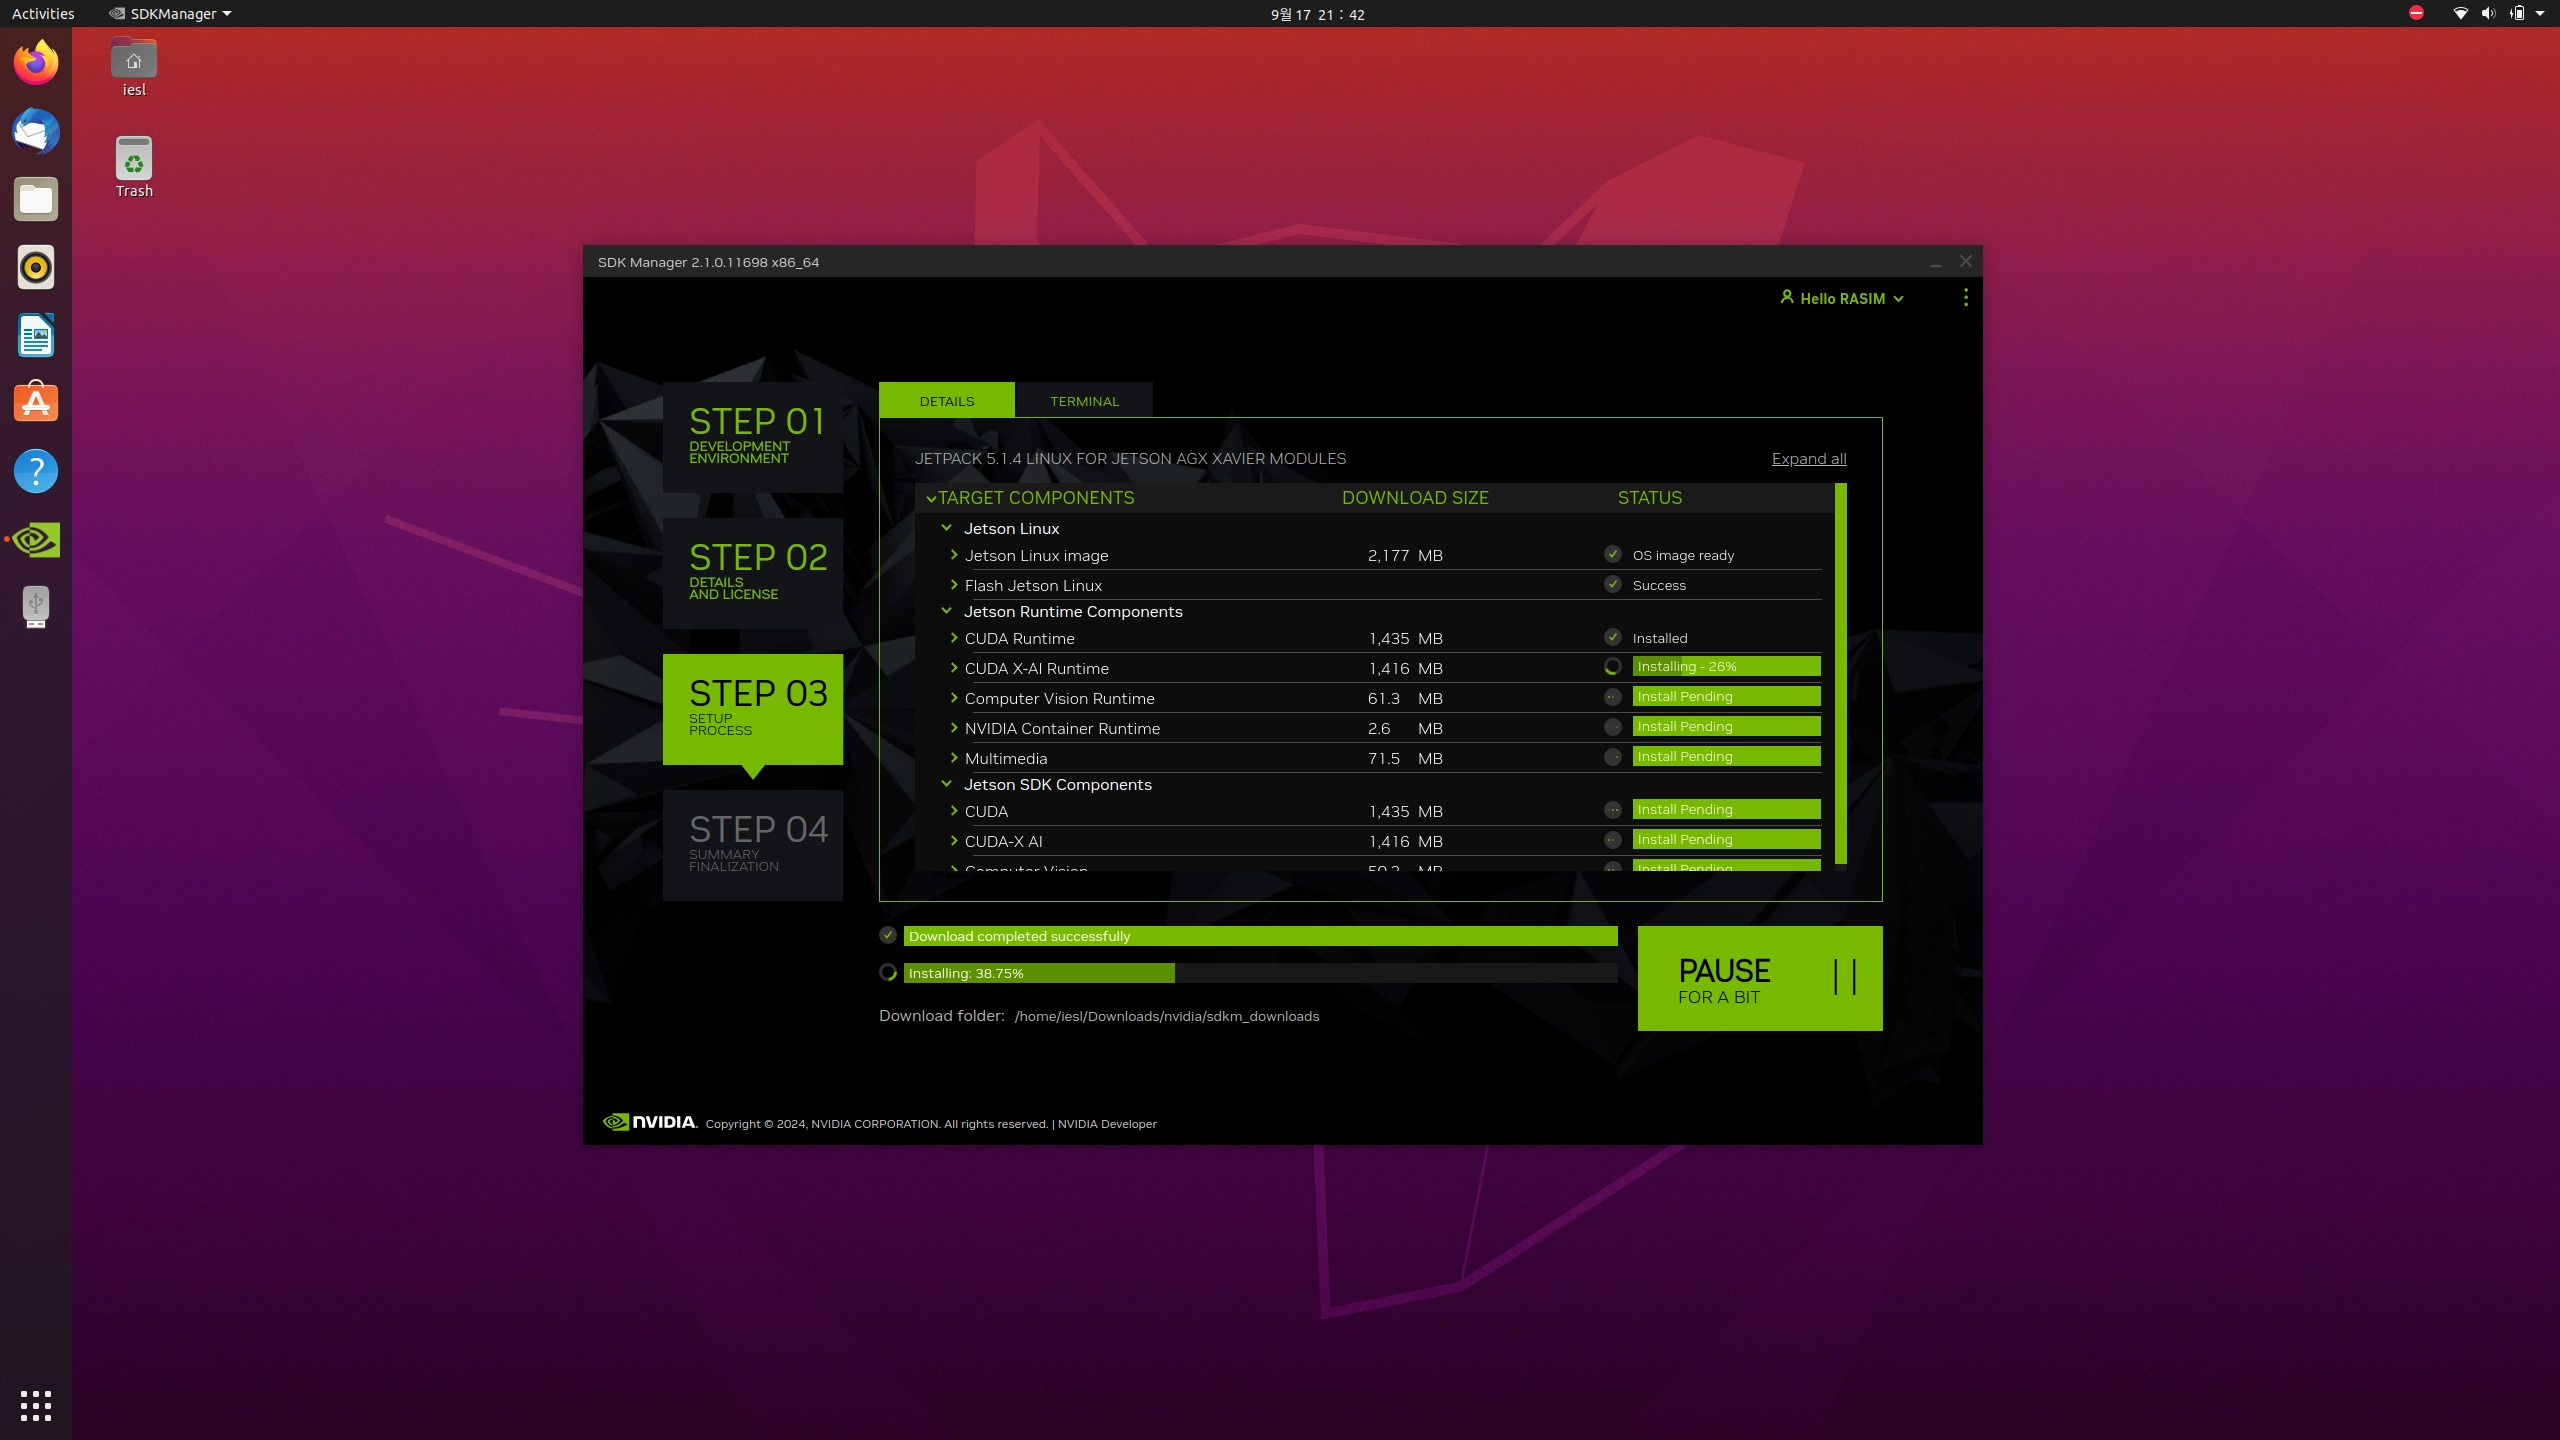
Install additional components.
After the base OS is flashed, SDK Manager continues by installing libraries, drivers, and optional tools. These include CUDA, TensorRT, DeepStream, and other Jetson SDK components that enable AI, computer vision, and deep learning workloads.
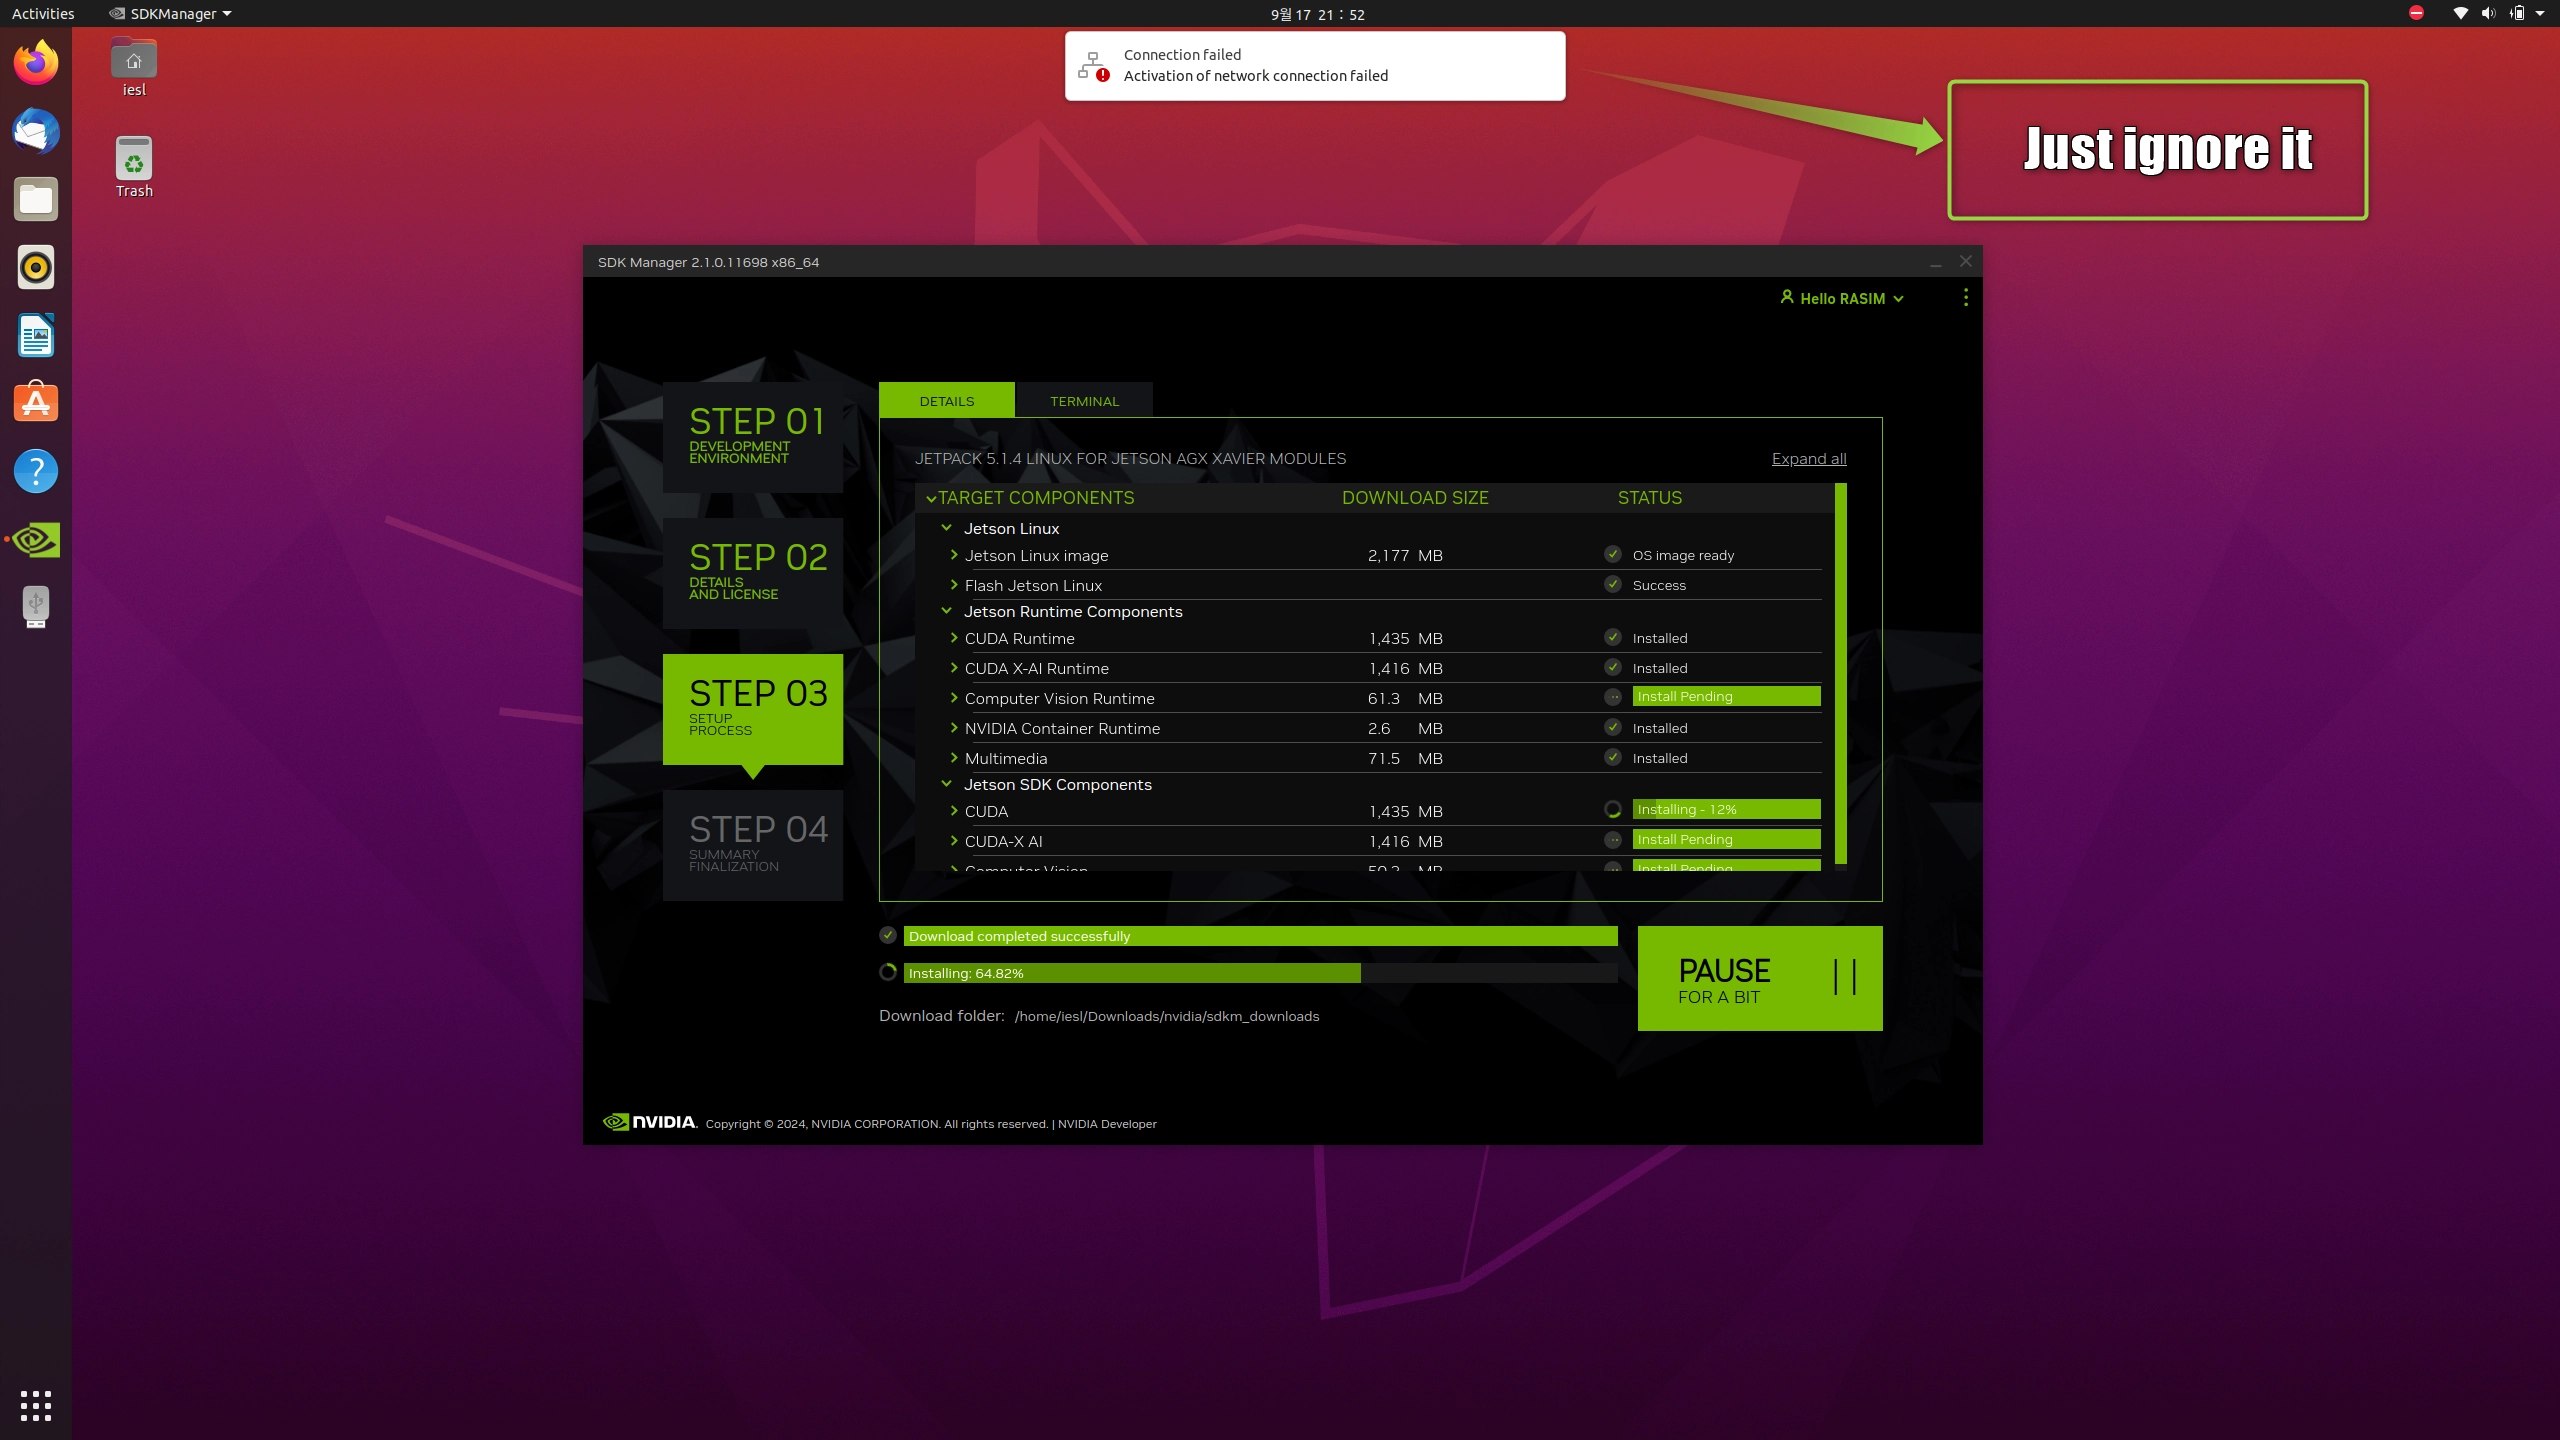
You may see occasional “connection failed” warnings — don’t worry. SDK Manager provides internet to the Jetson over USB tethering. -
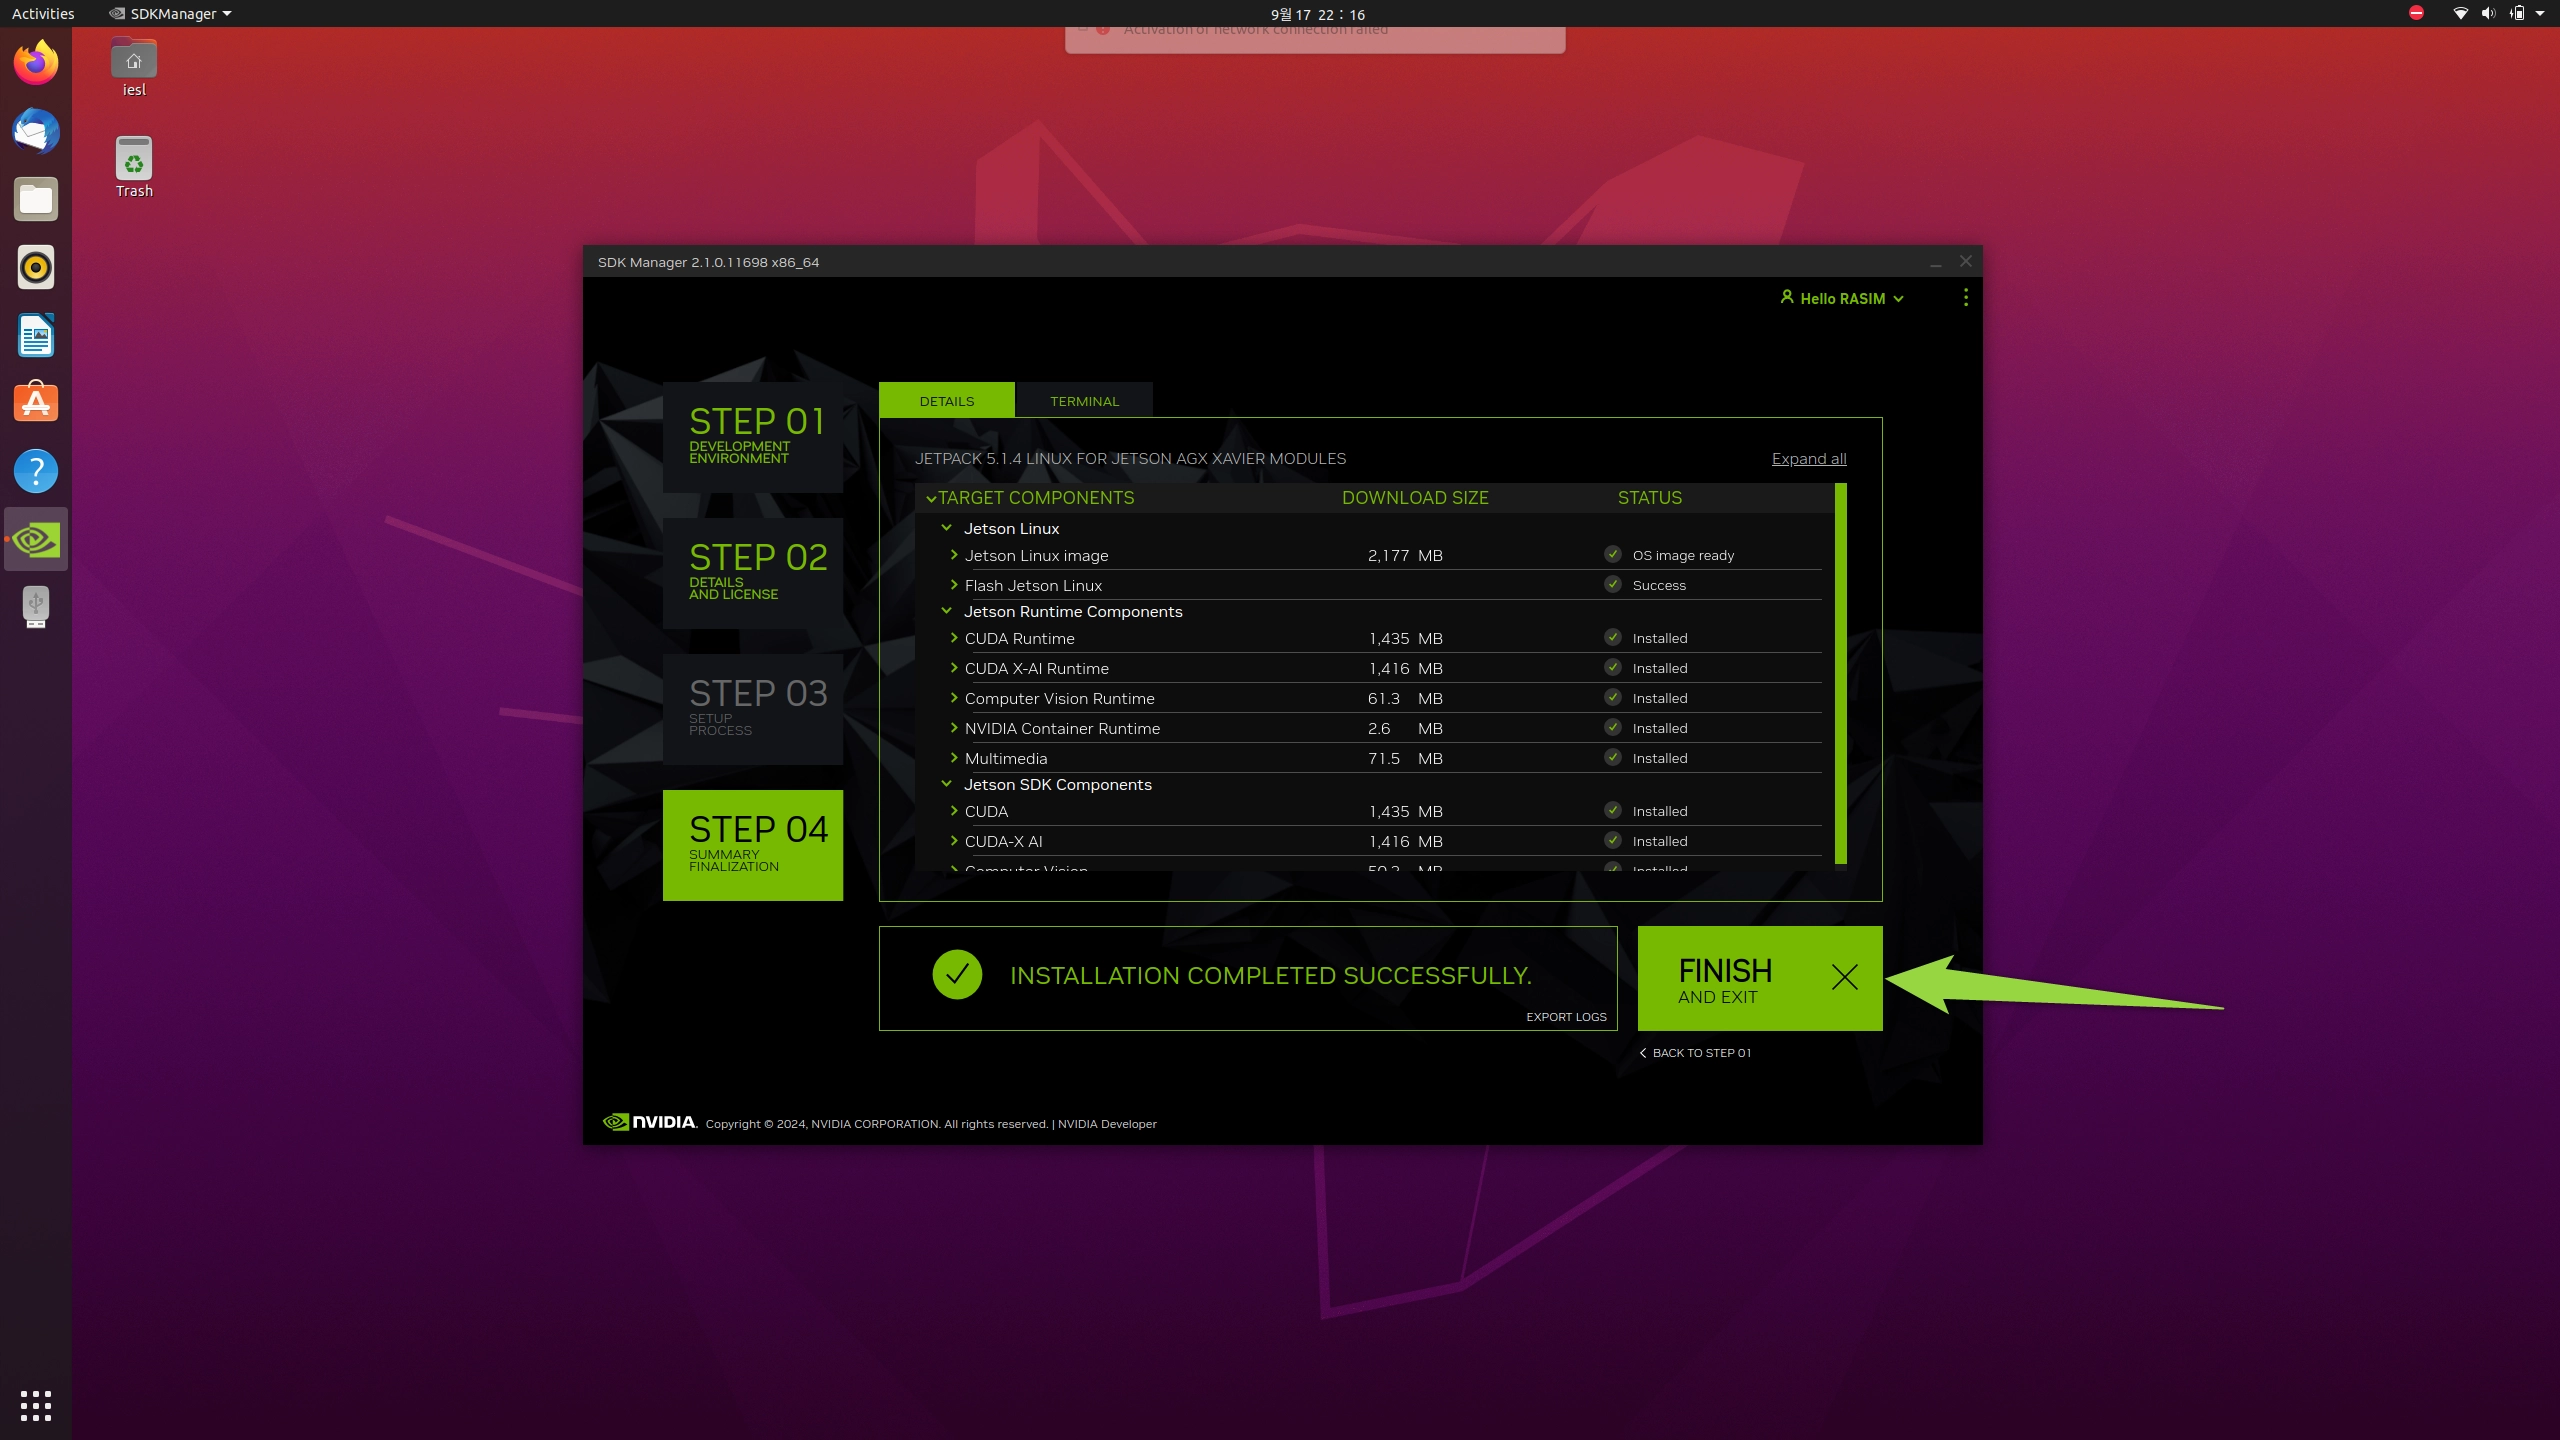
Finish installation.
Once all components are installed, SDK Manager will show a success screen. At this point, your Jetson Xavier AGX has a fresh JetPack installation and is ready to boot up with the username/password you set earlier.
Notes
- Do not unplug the Jetson or USB cable while flashing.
- Default installation is to eMMC storage, but other options are available.
- You can connect the Jetson to a monitor via HDMI during installation to see the setup in real time.
- Temporary “connection failed” errors are normal — the host bridges internet for the Jetson until setup finishes.
Conclusion
With JetPack successfully installed, your Xavier AGX is now ready for CUDA development, AI frameworks, robotics, and even Kubernetes deployment ?.

0 Comments
No comments yet, be the first!
Leave a Comment